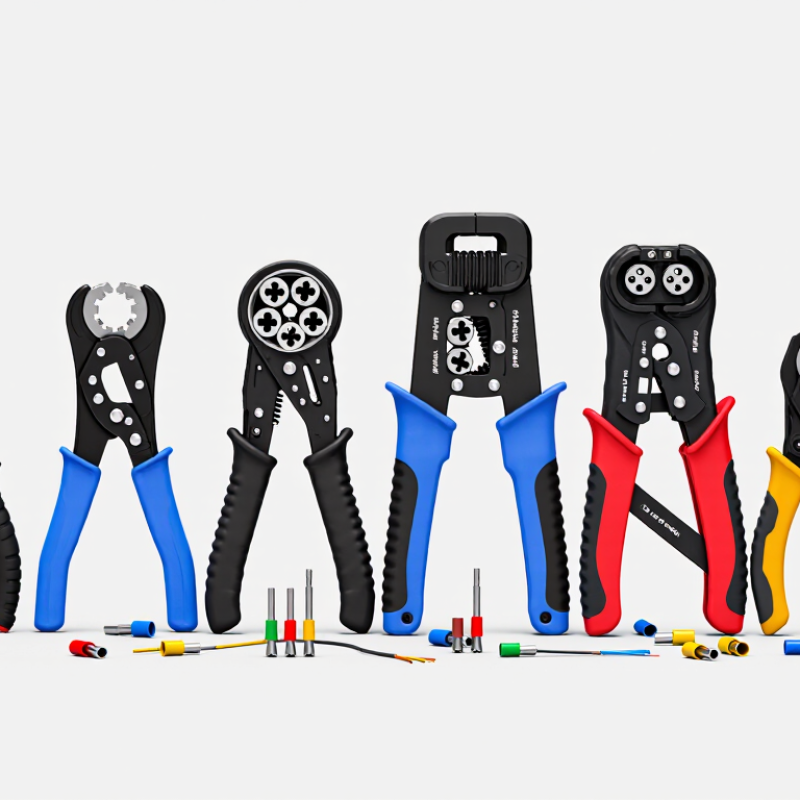
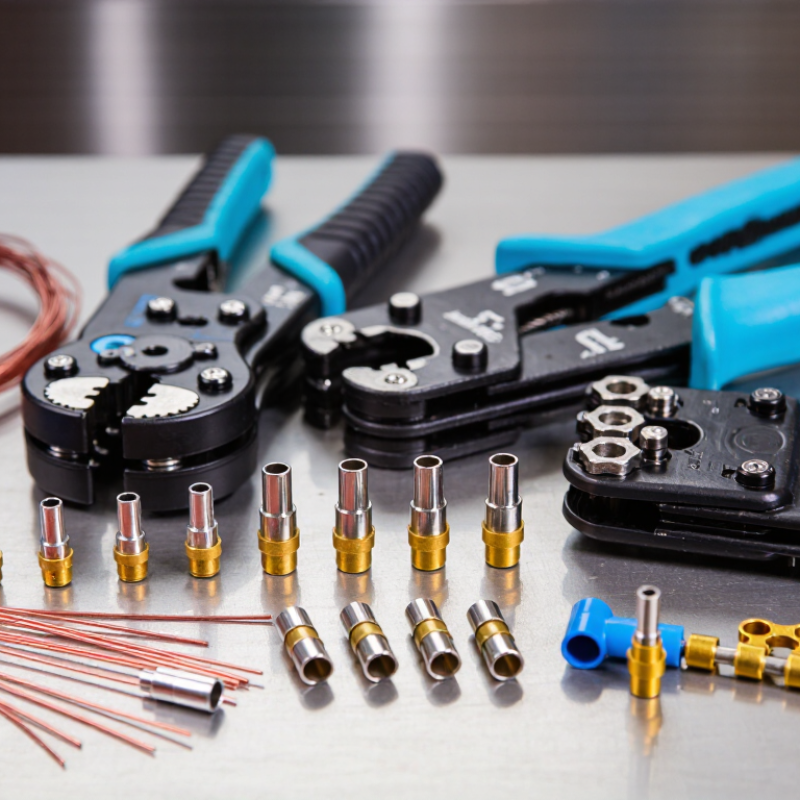
When you’re picking a good crimping tool, honestly, it’s the connection that matters first—not the handle. A terminal for a thin sensor lead is going to need different support than, say, a heavy battery lug. Use the wrong die and you can end up with a loose barrel, cut strands, or crushed insulation. And those problems? They can hide right under a crimp that looks perfectly neat. Looks can definitely deceive. A reliable choice is one that matches the wire gauge, the terminal type, and the crimp profile you actually need. It should also close the same way every time—no slipping jaws, and no confusing adjustment marks. If you’re doing repeated work, a ratchet mechanism can help you get through each cycle. That said, a ratchet by itself doesn’t really prove quality.
This guide looks at the practical stuff that affects your everyday results—things like die design, grip, adjustment, and whether it works with the terminals you commonly use. It also walks you through how to check a sample crimp before you trust the tool on a bigger job. Make sure the conductor is fully seated, and that the barrel holds the strands without any visible damage. And if the application allows it, do a gentle pull check and compare what you get with the terminal maker’s guidance. You know, when it comes to crimping, you really have to stick with what the tool and connector makers tell you—because specs can be all over the place. And here’s the thing: even if the handles feel totally fine, worn dies can still mess up your connections without you realizing it. It’s the little things that trip you up, honestly. There’s no magic tool that works for every wire and terminal combo, no matter how much you wish there was. Even pros, when they’re in a hurry, can miss that something’s not quite right. So, taking a moment to pick the right setup and then giving it a quick once-over beats just eyeballing it any day—trust me on that.

Understanding the Role of a Crimping Tool
A crimping tool creates a secure electrical connection by compressing a terminal barrel around a stripped wire. The pressure must be firm and even: too little can leave a loose joint, while too much may damage the conductor. Matching the tool’s die to the terminal and wire size is essential. A clean-looking crimp is not proof of a sound connection. That detail is easy to overlook.
The stakes extend beyond one connection. NFPA’s Home Electrical Fires report estimated an annual average of 46,700 U.S. home structure fires involving electrical failure or malfunction from 2015 to 2019. These figures are not specific to crimping, but they underline why connection quality matters. IEC 60352-2 also sets requirements and test methods for solderless crimped connections.
In practical work, inspection should include checking for exposed strands, a seated wire, and a firm terminal grip. If the result feels uncertain, redo it. Appearance alone can mislead.
Tips: Choose the correct die, strip only the required length, and test a sample connection before repeating the process. Good Wire Strippers help make a consistent strip, but they cannot correct a poor crimp. Small detail, big consequence.
Key Components That Shape Crimping Quality
Crimp quality starts with the die, the shaped surfaces that compress a terminal around a conductor. A die must match the terminal type and wire gauge; a close-looking fit can still leave a loose joint. Fit matters. Look for clear size markings and smooth, undamaged die faces. Burrs or wear may distort the crimp and damage insulation.
The ratchet mechanism helps maintain pressure through a full crimp cycle. It should release only after the handles complete their travel, though the required force varies by tool and connector. A stable hinge and comfortable handles also make repeated crimps easier to control. High-Quality Good Wire Strippers help prepare conductors without nicking strands, but stripping length still needs attention. Too little exposed wire can prevent proper contact; too much may leave copper outside the terminal. Not always. For critical work, inspect a sample crimp and follow the connector maker’s specifications. A pull test can reveal a weak hold, but visual checks alone are not enough. Calibration can drift, and even a solid tool may need periodic inspection.
Matching the Tool to Terminals and Wire Types
What Is a Good Crimping Tool?
Matching the Tool to Terminals and Wire Types
A good crimping tool is not simply the one with the strongest handles; it must match the terminal and wire. Identify the terminal style—open-barrel, insulated, or ferrule—then choose a die shaped for that connection. Check the wire gauge range on the tool against the wire size. A mismatch can leave loose strands or crush the conductor. That matters.
For a dependable result, the tool should close evenly and, when applicable, complete its ratchet cycle before releasing. Match the crimp cavity to the terminal size, not just the wire. Insulated Terminals need dies that support the sleeve without cutting it; bare terminals call for a different profile. After crimping, inspect for even compression, exposed copper, or cracked insulation. A gentle pull test can reveal a weak hold, but it cannot correct a poor tool match. It is easy to assume a clean-looking crimp is sound. Not always.
Tips: Test the first crimp on a spare wire. Check the terminal maker’s specifications, and replace worn dies; damaged edges can deform the barrel.
What Is a Good Crimping Tool? Match the Tool to Terminals and Wire Types
Wire cross-sectional areas are nominal values for common AWG sizes. Choose a crimper die that matches the terminal’s specified wire-size range and terminal type; AWG alone does not determine the correct crimp.
Features That Support Accurate, Consistent Crimps
What Is a Good Crimping Tool?
Features That Support Accurate, Consistent Crimps
A good crimping tool matches its die to the terminal size and wire gauge. The correct fit helps compress the metal evenly without cutting strands or leaving a loose connection. A ratcheting mechanism can maintain pressure through a full cycle, reducing variation between crimps. The release should work smoothly, especially when a terminal is positioned incorrectly. Small details matter.
Look for clearly marked dies, comfortable handles, and a tool that closes without excessive force. These features support steadier work during repetitive tasks. Good Quality Female Terminals still require a compatible tool and careful preparation; the terminal alone cannot ensure a reliable connection. Strip only the specified length of insulation, place the wire fully into the barrel, and check that no strands are folded back. After crimping, inspect the shape and confirm the wire holds securely. Follow the terminal maker’s specifications when available. A tool can feel solid and still produce poor crimps if its dies are worn or mismatched. Hand comfort also varies, so a tool that works well for one person may tire another.
Tips: Test a sample crimp before a full run. Check for exposed strands, cracked insulation, or a barrel that looks uneven. If the result seems questionable, stop and adjust the setup. Small checks save rework.
Ergonomics and Safety in Everyday Use
What Is a Good Crimping Tool?
Ergonomics and Safety in Everyday Use
A good crimping tool should feel controlled, not merely powerful. When choosing one, check that its handles fit your hand and close without awkward wrist movement. A cushioned grip can reduce pressure during repeated work, but it should not feel slippery. Fit matters. If your fingers tire quickly, the tool may be poorly matched to the task or your hand.
Use the correct die and connector size, following the tool’s instructions. A mismatched setup can produce a loose or damaged crimp, even when the handles feel comfortable. Keep fingers clear of the closing jaws, and wear eye protection if trimmed wire ends could spring away. Before a longer session, test a sample and inspect the crimp for even compression. Stop and reset. I still find it tempting to squeeze harder when a crimp looks imperfect, but extra force is not a reliable fix. Check the alignment and settings instead. Keep the handles and jaws clean, and replace a tool with cracked grips or uneven movement. A short pause can help prevent hand fatigue from turning careful work into rushed work.
Choosing and Maintaining a Reliable Crimping Tool
What Is a Good Crimping Tool?
Choosing and Maintaining a Reliable Crimping Tool
A reliable Wire Crimping Tool produces a tight, repeatable connection without cutting strands or deforming the terminal. Match the tool and die to the wire gauge and connector type. On the bench, a sound crimp should sit evenly, with no loose strands or sharp, crushed edges. Small details matter.
Maintenance keeps that result consistent. Brush metal fragments from the die after use, and store the tool dry with its jaws closed. Check the ratchet for smooth movement and make sure it releases only after a complete cycle. Replace worn dies; a slightly rounded cavity can leave a connection that looks acceptable but pulls loose. Verify settings against the tool’s instructions, then test sample crimps with an appropriate pull tester or crimp-height gauge. I have learned that a quick visual check is useful, but not enough on its own.
The need for dependable electrical connections is reflected in an NFPA report analyzing U.S. data from 2015–2019: electrical failure or malfunction was associated with an estimated 32,620 home structure fires annually. The report does not isolate crimp failures, so it cannot tell us how many involved poor crimps. It does underline why repeatable workmanship matters. Keep a simple inspection log, especially when tools see frequent use, and arrange calibration or verification at intervals suited to the workload. Even a good tool drifts.
| Tool Type | Typical Applications | What to Check Before Buying | Signs of a Reliable Tool | Basic Care |
|---|---|---|---|---|
| Insulated-terminal crimper | Crimping compatible insulated ring, spade, and Butt terminals onto stranded wire. | Confirm the tool’s wire-size range and that its die is intended for the terminal type and insulation profile. | Clearly marked die positions, comfortable handles, and consistent crimps without cutting or splitting the insulation. | Brush away debris, keep the pivot clean, and inspect the die surfaces for wear or damage. |
| Non-insulated terminal crimper | Crimping compatible bare copper terminals and connectors to stranded conductors. | Match the die shape and wire-size range to the specified terminal; a non-insulated die is not automatically suitable for every connector. | A well-aligned die that forms the barrel evenly and holds the conductor securely without excessive deformation. | Check the jaws for burrs, corrosion, and misalignment; store the tool dry. |
| Open-barrel terminal crimper | Crimping compatible open-barrel contacts, commonly used in wiring harnesses and electronic assemblies. | Check that the die is designed for the contact’s conductor wings and insulation-support wings, as well as the wire size. | Precisely matched dies produce a formed conductor crimp and an appropriate insulation-support crimp. | Remove metal fragments and inspect the small die features regularly for wear or damage. |
| Coaxial cable crimper | Installing compatible crimp-style coaxial connectors onto specified coaxial cables. | Verify compatibility with the cable diameter, connector type, and required hex or other die size. | The connector seats squarely in the die, and the finished ferrule is uniformly compressed. | Keep the die clean and check that interchangeable dies are seated and secured correctly. |
| Modular-plug crimper | Terminating compatible modular plugs on prepared communication cable. | Confirm the tool supports the plug format and cable construction being used; plug and cable compatibility matters. | The plug sits securely in the tool, and the contacts are pressed evenly when the handles close. | Clear cuttings from the cutting and stripping areas and check blades for dullness or damage. |
| Hydraulic crimper | Crimping larger cable lugs or connectors when the connector system calls for a hydraulic tool. | Check the tool’s capacity, compatible dies, connector specifications, and any required inspection or calibration guidance. | Smooth operation, secure die retention, and no visible hydraulic-fluid leaks. | Inspect for leaks and damage, clean the dies, and follow the manufacturer’s service and fluid-maintenance instructions. |
| Good-practice check: Use the connector and tool specifications to select the correct die and wire-size range. For critical connections, use the specified crimping process and inspection method; replace or service a tool if it is damaged, badly worn, or produces inconsistent crimps. | ||||
HSC8 6-4A Crimping Pliers: A Practical Guide Informed by Mordor Intelligence’s Electrical Wiring Interconnection System Market Report
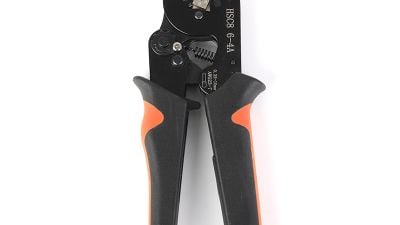
Electrical wiring interconnection systems are becoming more demanding as vehicles and industrial equipment rely on increasingly complex electrical networks. Mordor Intelligence’s *Electrical Wiring Interconnection System Market* report analyzes market size, forecasts, and end-use segments, highlighting automotive applications and the importance of reliable wiring assemblies. In this context, an HSC8 6-4A crimping tool can support consistent terminal work across automotive harness production, factory assembly, solar installations, and electrical panel maintenance. Its ratchet mechanism is designed to complete the crimp cycle before release, while an adjustable rotary dial helps control crimping force and reduce the risk of incomplete or excessive compression.
For technicians handling different terminal sleeves, tool-less, color-coded dies can speed up changeovers without adding a separate adjustment step. A thumb-operated release provides quick terminal ejection, and a titanium spring is specified to reduce hand force by up to 60%, which may help during repetitive tasks. The dual-layer insulated grip is rated for 1000 V; always follow the tool’s instructions and site procedures, and de-energize circuits before work. CE and TÜV credentials should be confirmed for the exact tool configuration. Together, these features are aimed at improving repeatability, minimizing wasted terminals, and making routine crimping more manageable in demanding wiring environments.
FAQS
The die must match the terminal style and wire gauge. A close-looking fit can still leave a loose joint. Fit matters.
Look for clear size markings and smooth, undamaged faces. Burrs or worn edges may deform the terminal or damage insulation.
It should release after the handles complete their travel. The force needed varies, so check the tool’s specifications.
Too little exposed wire can weaken contact. Too much may leave copper outside the terminal. Check the terminal’s specified stripping length.
No. Match the die cavity to both the terminal and wire. Insulated terminals need support for the sleeve; bare terminals use a different profile.
Inspect for even compression, exposed copper, or cracked insulation. A gentle pull test may reveal a weak hold, but it is not conclusive.
Not always. Appearance can hide a poor tool match or weak connection. Test the first crimp on spare wire, then review the result.
Check dies periodically for wear, since calibration can drift. Replace damaged dies; even a solid tool may need attention.
Conclusion
A Good Crimping Tool creates a secure, consistent connection by applying controlled pressure to join a terminal and wire. Its quality depends on well-aligned dies, a reliable ratcheting or pressure mechanism, and a sturdy frame that resists flexing. Choosing a tool that matches the terminal type, wire size, and material is essential; a mismatch can produce a loose, damaged, or uneven crimp.
For accurate results, look for clear size markings, repeatable operation, and features that help position the wire and terminal correctly. Comfortable handles and a secure grip can reduce hand strain during frequent use, while built-in safety features help make everyday work more controlled. Before choosing, consider the connections you need to make and how often you will use the tool. Keep it clean, inspect it for wear, and store it properly so it continues to deliver dependable crimps.