Why Use Butt Connectorsfor Secure Wire Connections? You’ve probably tried just twisting two wires together and hoped for the best, but reliable wiring needs more than that. The connection has to hold up against vibration, moisture, heat, and constant movement – things that can easily loosen a simple twist. That’s where Butt Connectors shine. They give you a compact, clean way to join two wires end to end. And if you choose the right ones, you get a termination that’s both protected and mechanically solid, so you can trust it.
You know, Mark E. Schaffer—he’s an electrical-termination engineer who’s spent plenty of time in the field—once said something that really sticks with you: “A crimp is only as reliable as the preparation behind it.” And honestly, that’s worth thinking about. Getting the wire stripped just right, picking the right connector size, and making sure the crimp tool applies the proper pressure—these details can make or break the connection. What’s tricky is that a connector can look absolutely fine on the outside while hiding a weak joint that might fail later on. So yeah, it’s the behind-the-scenes stuff that counts.
You know, butt connectors are pretty handy for repairs—whether you’re poking around inside your car, a control panel, or some low-voltage gear. A lot of them come with heat-shrink insulation, so once you hit ’em with some heat, the joint seals up nicely. The whole thing ends up feeling really solid, and it also cuts down on exposed metal and accidental contact, which is always a plus.
You know, butt connectors aren’t exactly foolproof. If the terminals don’t match up well, they can loosen over time. Too much crimping? That can damage the wire strands. And in moist environments, the standard insulated ones might fail way earlier than the sealed ones. Ultimately, it’s all about how you install them.
A careful technician pays attention to the conductor gauge, connector material, insulation rating, and the working environment. They also do a gentle pull test after crimping – something that sounds minor but catches all sorts of sneaky mistakes.
Look, this method definitely has its merits, but let’s be real—it’s not perfect. You’ll find that some setups just won’t cooperate unless you go with soldered, welded, or those specialized sealed connections. So, what’s the safest bet? Well, it really boils down to the gear you’re using, how much current is flowing through, and the environment you’re working in. In this guide, I’m going to walk you through where Butt Connectors actually shine, where they might leave you scratching your head, and how putting a little extra thought into the installation can make a world of difference for reliability.

What Are Butt Connectors and How Do They Work?
Wire Butt Connectors are small sleeves designed to join two wires end to end. They create a compact connection without twisting exposed conductors together. Most connectors contain a metal barrel inside an insulated outer layer. Each wire enters from opposite sides.
The process is simple, but accuracy matters. First, disconnect power and strip only the required insulation length. The copper should fill the barrel without protruding excessively. Insert each wire fully, then compress the barrel with a suitable crimping tool. A proper crimp reshapes the metal around the conductors. It should feel firm, not crushed.
I usually perform a gentle pull test after crimping. The wires should stay in place. For outdoor or damp areas, heat-shrink versions add another protective barrier. They can seal the joint against moisture when heated evenly. Do not use a lighter carelessly near insulation. A controlled heat source is safer.
Wire size compatibility is easy to overlook. Check the connector range before starting. An oversized connector may grip poorly, while a small one can damage the strands. I have occasionally found a connection that looked perfect but failed under movement. That is why visual inspection alone is not enough. Check for exposed copper, uneven crimp marks, and loose insulation. A multimeter can confirm continuity, but it cannot prove mechanical strength. The connection still needs a physical test.
How Butt Connectors Create Secure Electrical Connections
Butt connectors create secure electrical connections by joining two wire ends inside a metal barrel. Each wire is stripped to the correct length and inserted from opposite sides. A properly sized crimp then compresses the barrel around the conductors. This creates firm metal-to-metal contact and limits movement at the joint.
The connection depends on technique.Match the connector to the wire gauge and conductor type before crimping. A quality Ratcheting Crimper applies steady pressure and reduces loose crimps. Afterward, perform a gentle pull test. The wires should not slide or separate.It feels simple. It is not always foolproof.
For outdoor or damp locations, heat-shrink butt connectors add another protective layer. When heated evenly, the sleeve seals around the insulation and helps reduce moisture entry. Keep the heat source moving to avoid damaging the insulation. In practical repairs, many failures come from excessive stripping, uneven crimps, or wires that were not fully inserted. I have also seen technicians trust appearance too quickly; a neat sleeve does not prove a reliable connection. Inspect the barrel, check the insulation support, and test continuity before placing the wiring under load. A secure joint should remain stable during light vibration, bending, and normal temperature changes. However, butt connectors cannot correct damaged conductors or poor circuit design. That part still requires careful judgment.
Key Materials and Designs Used in Butt Connectors
Butt connectors create secure wire connections by joining two conductors inside a metal barrel. Their materials and internal design determine how well they perform. Copper offers strong conductivity and excellent crimping behavior. Tinned copper adds protection against moisture and oxidation. Aluminum may reduce weight, but it needs careful compatibility checks. The outer sleeve usually uses nylon, PVC, or heat-shrinkable polyolefin. Each material handles heat, vibration, and chemicals differently.
In practical wiring work, I have found that barrel length matters more than many installers expect. A longer barrel gives the crimp more contact area. A transparent sleeve also helps confirm wire placement before crimping. Heat-shrink designs add sealing around the joint, especially near engines, outdoor panels, and damp equipment. Wire Connectors Butt products should match the conductor size and the crimping tool. A loose crimp can look acceptable and still create resistance, heat, or intermittent faults. No connector is perfect. Poor stripping can damage strands, even with a well-designed terminal.
Tips: Check the printed wire range before installation. Strip only the required insulation length. Insert the wire fully into the barrel. Use a calibrated crimper when reliability matters. After crimping, pull the wire firmly by hand. For critical circuits, inspect the joint and test continuity under load. Personally, I would not rely on appearance alone; a neat connection can still hide weak compression.
How to Choose the Right Butt Connector for Each Wire
Choosing the right butt connector starts with the wire, not the package. A connector that fits one cable may fail on another. Check the conductor’s gauge, strand count, and insulation diameter. A solid conductor and flexible stranded wire can need different crimp pressure. Choose a connector whose listed range matches the stripped conductor, not the insulation. The metal barrel should grip firmly without cutting strands. The smallest detail matters.
Consider the working environment. Use sealed connectors for moisture, road spray, or outdoor equipment. Heat-resistant insulation suits areas near engines or heating devices. For vibrating machinery, select a connector with strong strain relief and verify the crimp with a gentle pull test. Always disconnect power before cutting or crimping wires. I have found that rushed measurements cause most connection problems. Measure twice. Strip only the recommended length, and keep copper strands clean and straight. An imperfect crimp may look acceptable but loosen later.
Tips:
Match the connector to the wire gauge and insulation type. Use a proper crimping tool, not ordinary pliers. After crimping, inspect both ends for exposed copper, cracks, or movement. A heat-shrink seal can add protection, but it cannot repair a weak crimp. When uncertain, check the connector’s technical sheet and reassess the installation.
Step-by-Step Guide to Installing Butt Connectors
Butt Joint Connectors provide a compact way to join two wires without twisting exposed conductors. NFPA reported about 35,150 home structure fires annually involving electrical distribution and lighting equipment from 2012 to 2016. Reliable terminations matter. A loose crimp can create resistance, heat, and eventual insulation damage.
Start by switching off power and confirming zero voltage with a properly rated tester. Select a connector matching the wire gauge, conductor material, and insulation type. Strip only the required length. Do not nick the copper. Insert each wire fully into opposite ends of the Butt Joint Connectors. The conductor should reach the inspection openings, if provided. Use the correct crimping tool and die, not ordinary pliers. Crimp the marked areas firmly.
Then perform a gentle pull test on both wires. The conductors should not move. Inspect the sleeve for cuts, distortion, or exposed strands. Apply heat evenly when using heat-shrink connectors. Avoid overheating the insulation. IPC/WHMA-A-620 identifies crimp quality, conductor placement, and insulation support as important acceptance factors for cable assemblies. A continuity test can confirm the circuit, but it cannot prove mechanical strength. I still recheck every joint after testing. Some failures hide beneath clean insulation. That small doubt deserves attention.
Why Use Butt Connectors for Secure Wire Connections? – Step-by-Step Guide to Installing Butt Connectors
| Step | Installation Stage | What to Do | Recommended Practice | Verification Check |
|---|---|---|---|---|
| 1 | Disconnect Power | Turn off the circuit and isolate the power source before handling the wires. | For mains or industrial circuits, apply the applicable lockout/tagout procedure and verify that the circuit is de-energized. | Use an appropriately rated voltage tester; do not rely only on a switch being turned off. |
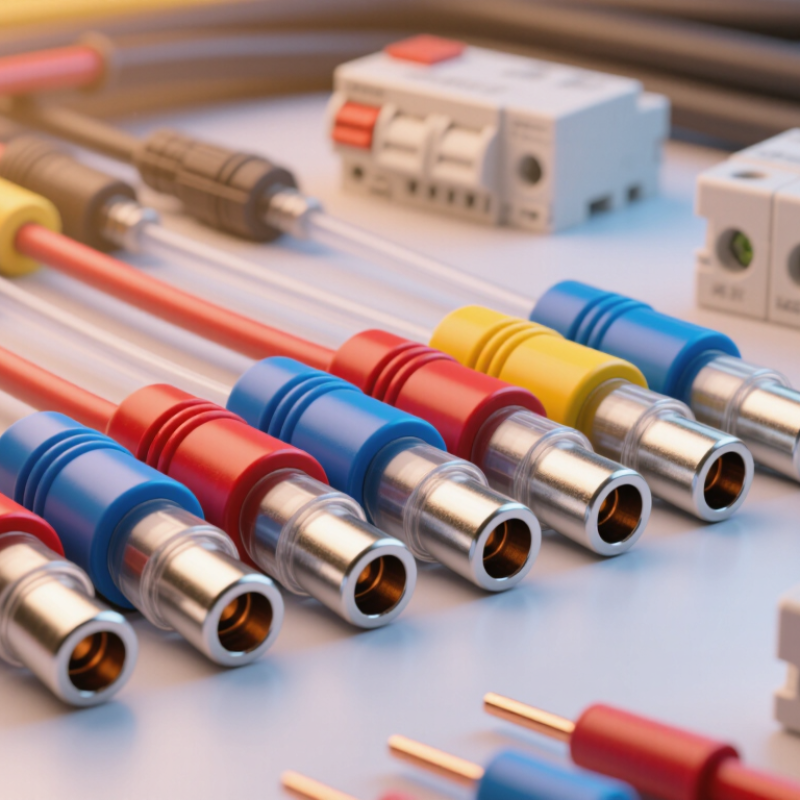
| 2 | Select the Connector | Choose a butt connector whose marked wire-size range matches both conductors. | Common insulated color ranges are red for 22–16 AWG, blue for 16–14 AWG, and yellow for 12–10 AWG. Always follow the marking on the connector. | Confirm compatibility with the conductor material, insulation type, voltage, current, and installation environment. |
| 3 | Prepare the Wires | Cut away damaged sections and make clean, straight wire ends. | Do not nick, cut, or reduce the conductor strands. Remove oxidation or contamination before crimping. | The strands should remain complete, straight, and free from loose fragments. |
| 4 | Strip the Insulation | Strip enough insulation for the conductor to reach the connector’s internal stop or inspection opening. | Use the strip length printed on the connector packaging or specified in its technical documentation; strip lengths are not universal. | No bare conductor should extend beyond the connector barrel or heat-shrink seal. |
| 5 | Insert the First Wire | Push the stripped conductor fully into one side of the butt connector. | Keep the conductor centered in the barrel and ensure all strands enter the connector. | Check through the inspection opening, if provided, that the conductor reaches the required position. |
| 6 | Crimp the First Side | Place the connector in the correct cavity of a ratcheting crimp tool and complete the crimp. | Use a crimp cavity that matches the connector’s wire-size range. Do not substitute pliers, a hammer, or an incorrectly sized die. | The crimp should be firm, centered, and free of cracks or severe deformation. |
| 7 | Insert and Crimp the Second Wire | Insert the second stripped conductor from the opposite side and crimp it using the same method. | The two wires should be aligned with the connector barrel and should not overlap outside the connector. | Perform a gentle pull test on each wire. Neither conductor should move or slide out. |
| 8 | Seal the Connection | If using heat-shrink tubing or a heat-shrink butt connector, apply controlled heat until the material forms a uniform seal. | Use a heat gun rather than an open flame, and avoid overheating the insulation or connector. | The seal should be continuous, snug, and free from scorching, gaps, or exposed conductor. |
| 9 | Inspect and Test | Inspect the finished connection and test electrical continuity before restoring power. | For critical circuits, measure resistance or perform an approved load test using equipment rated for the circuit. | Confirm continuity, correct polarity where applicable, secure mechanical retention, and no visible overheating. |
Safety, Durability, and Common Installation Considerations
Crimp Butt Connectors create a compact joint between two wires, when installed correctly. They help protect exposed conductors from accidental contact and short circuits. In field repairs, I have found that a clean connection begins with the right connector size. An oversized terminal may loosen under vibration. An undersized one can damage wire strands during crimping.
Durability depends on more than squeezing the metal sleeve. Strip only the required insulation length, then insert each wire fully. The bare strands should remain inside the barrel, not outside its edges. Use a suitable crimping tool and apply firm, even pressure. A gentle pull test can reveal a weak connection. Heat-shrink insulation adds protection against moisture, abrasion, and movement. Still, it is not a substitute for a proper crimp. I sometimes recheck finished connections after routing the harness, because wires can shift during installation.
Tips: Match the connector to the wire gauge. Keep the work area dry and clean. Avoid twisting damaged strands into the barrel. Check that insulation is supported without entering too deeply. For harsh environments, use connectors designed for added sealing. Test continuity before energizing the circuit. One detail is easy to miss: sharp bends near the connector can stress the joint. Leave a small service loop instead. Even experienced installers occasionally rush this step, and that is where reliability can suffer.
Safety, Durability, and Common Installation Considerations
Selecting a butt connector begins with matching its rated wire range to the conductor size. The chart shows approximate copper conductor cross-sectional areas for common AWG sizes, based on standard AWG dimensions. A correctly sized connector, fully inserted conductors, and a properly completed crimp help create a mechanically secure and electrically reliable joint. For added durability, adhesive-lined heat-shrink connectors can help reduce moisture and corrosion exposure.
PVC Insulated Butt Connectors: A Practical Guide to Reliable Wire Splicing and Installation
PVC insulated butt connectors provide a practical method for creating secure, compact wire splices in automotive, industrial, and general electrical installations. Their factory-installed sleeves remove the need for separate heat-shrink tubing, reducing installation time and minimizing exposed conductor areas. A 0.8 mm PVC sleeve, rated from -20°C to 80°C, helps protect the joint against moisture, oil, and mild acid corrosion. These specifications are consistent with the temperature and insulation considerations commonly evaluated under UL 486C requirements for wire connectors.
Inside the connector, a tin-plated copper barrel supports stable electrical performance and improved oxidation resistance. With a stated contact resistance below 0.5 mΩ and continuous-current capacity up to 30 A, the connector is designed for dependable power transmission when correctly crimped with a compatible tool. Industry testing practices for crimp terminals typically assess mechanical pullout strength, voltage drop, and temperature rise, making proper conductor preparation and crimp pressure essential to long-term reliability.
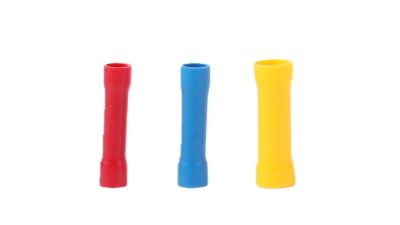
Color coding further improves installation accuracy: red connectors fit 16–14 AWG wires, blue connectors fit 14–12 AWG, and yellow connectors fit 12–10 AWG. Before crimping, strip only the recommended insulation length, insert the conductor fully into the barrel, and verify that no copper strands remain exposed. A firm crimp should hold the wire without damaging the PVC sleeve, while a final light pull test can help confirm a secure splice.
FAQS
It joins two wire ends inside a metal barrel. Each wire enters from an opposite side. A crimp compresses the barrel around both conductors.
Match the connector with the wire gauge and conductor material. Check the printed wire range before installation. Compatibility matters.
Use a suitable crimping tool with the correct die. A ratcheting crimper applies steady pressure. Ordinary pliers may create a weak connection.
Strip only the required insulation length. Avoid nicking or cutting copper strands. Insert each wire fully into the barrel.
Pull each wire firmly by hand. The wires should not slide or separate. Then inspect for exposed strands, distortion, or damaged insulation.
Yes, they add sealing around the joint. Heat the sleeve evenly while keeping the heat source moving. Avoid overheating the insulation.
No. It confirms that electricity can pass through the joint. It does not prove mechanical strength or resistance under load.
Excessive stripping, incomplete insertion, and uneven crimps can cause problems. A neat sleeve may still hide weak compression. Looks neat. Still risky.
No. They cannot fix damaged conductors or poor circuit design. Check the circuit before joining wires. A small doubt deserves attention.
Conclusion
Butt Connectors are practical electrical components designed to join two wires in a secure, insulated connection. They typically use a metal barrel to hold the stripped wire ends and an outer layer of insulation to help protect the joint from moisture, abrasion, and accidental contact. When properly crimped, the connector creates firm mechanical pressure and a reliable electrical path, making it suitable for many wiring and repair applications.
Choosing the right Butt Connectors involves matching the connector size and material to the wire gauge, insulation type, and working conditions. Some designs offer heat-shrink protection or enhanced resistance to vibration and moisture. Installation requires stripping the wires to the correct length, inserting each end fully into the connector, and applying the correct crimping tool and pressure. A final inspection should confirm that the wires are secure, the insulation is undamaged, and no bare conductor is unnecessarily exposed. Proper selection and installation improve safety, durability, and connection performance.